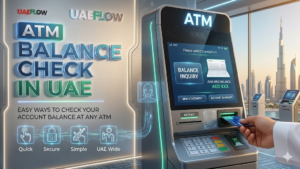
ATM balance check: Step-by-Step ATM Guide 2026 Tips 26!
Checking your bank balance shouldn’t feel like a guessing game. Whether you’re standing in line at the grocery store wondering if your card will go through, or you’re traveling and need to confirm funds before withdrawing cash, knowing how to do an ATM balance check quickly and correctly can save you time, embarrassment, and even money in unnecessary fees.
In this guide, we’ll walk through everything you need to know about performing an ATM balance check — from the exact steps on the machine, to bank-specific menu differences, to alternative methods if you don’t have your card handy, to the most common errors people run into and how to fix them. By the end, you’ll know not just how to check your balance at an ATM, but which method is actually best for your situation.
Why an ATM Balance Check Still Matters
With mobile banking apps everywhere, you might wonder why anyone still bothers with an ATM balance check. The truth is, ATMs remain one of the most reliable, accessible, and immediate ways to confirm your funds — especially when:
- Your phone battery is dead or you don’t have mobile data
- You’re traveling internationally and your banking app isn’t working abroad
- You want a printed receipt as proof of balance for record-keeping
- You’re someone who simply prefers not to rely on apps for sensitive financial information
- You need to confirm funds right before withdrawing cash, to avoid overdraft fees
An ATM balance check takes less than 30 seconds once you know the process, and it works at virtually any ATM — yours or another bank’s (though fees may apply, which we’ll cover later).
Step-by-Step: How to Perform an ATM Balance Check
Here’s the general process for an ATM balance check. While exact wording varies slightly by bank (more on that below), the core flow is nearly universal.
Step 1: Insert Your Debit Card
Insert your debit or ATM card into the card reader slot, following the orientation shown on the machine (usually chip-side up or facing in, depending on the machine type). Wait for the machine to read the card before proceeding.
Step 2: Select Your Language
Most ATMs will prompt you to choose a display language first. This is a small step but helps ensure you don’t misread menu options in the steps that follow — especially important if English isn’t your first language or if you’re using an ATM abroad.
Step 3: Enter Your PIN
Enter your 4-digit (or sometimes 6-digit) Personal Identification Number using the keypad. For privacy and security, use your other hand or body to shield the keypad from anyone standing nearby. This is one of the most important security habits when performing any ATM transaction, including an ATM balance check.
Step 4: Select “Balance Inquiry” or “Balance Enquiry”
Once your PIN is verified, you’ll see a main menu with options like:
- Cash Withdrawal
- Balance Inquiry / Balance Enquiry
- Mini Statement
- Fund Transfer
- PIN Change
- Deposit
Select “Balance Inquiry” (sometimes labeled “Balance Enquiry” depending on the bank and region). This is the core action of any ATM balance check.
Step 5: Choose Your Account Type
If you have multiple accounts linked to the same card (savings, checking/current, or credit), the ATM will ask you to specify which account you want the balance for. Select the correct account — choosing the wrong one is a common reason people get confused by the result of an ATM balance check.
Step 6: View Your Balance On-Screen or Request a Receipt
Depending on the ATM, your balance will either:
- Display directly on the screen, or
- Be printed on a small receipt slip
Many machines give you the option to choose. If you want a paper record (useful for budgeting or proof of funds), select “Print Receipt.” If you just need a quick glance, the on-screen display is faster.
Step 7: Take Your Card and Receipt (If Printed)
Don’t forget your card! This sounds obvious, but a surprising number of cards get left behind after a quick ATM balance check, especially when the transaction feels “too simple” to require attention. If a receipt printed, take that too — it contains sensitive account information.
That’s it. The entire ATM balance check process, from card insertion to balance display, typically takes under a minute. sharjah muroor
Bank-Specific Menu Differences for ATM Balance Check
While the steps above are fairly universal, the exact menu wording and navigation path for an ATM balance check can differ between banks. Here’s a general reference table based on common menu structures:
| Bank | Menu Path for Balance Check | Notes |
|---|---|---|
| State Bank of India (SBI) | Main Menu → Balance Enquiry | May require selecting account type if multiple accounts exist |
| HDFC Bank | Main Menu → Balance Enquiry → Select Account | Offers screen display by default |
| ICICI Bank | Main Menu → Balance Inquiry | Receipt option appears after PIN entry |
| Axis Bank | Main Menu → Mini Statement / Balance Enquiry | Mini statement also shows balance at the top |
| Punjab National Bank (PNB) | Main Menu → Balance Enquiry → Savings/Current | Slower processing on older machines |
| Bank of Baroda | Main Menu → Balance Enquiry | Often combined with mini statement option |
| Chase (US) | Main Menu → Balance Inquiry | Screen-only display, no receipt by default |
| Bank of America (US) | Main Menu → Balance Inquiry | Receipt option available |
| Wells Fargo (US) | Main Menu → Account Info → Balance | Slightly longer navigation path |
If your bank isn’t listed here, the safest approach is to look for “Balance Inquiry,” “Balance Enquiry,” or “Account Information” on the main ATM menu — one of these will always lead you to the ATM balance check option.
Available Balance vs. Ledger Balance: Why Your ATM Balance Check Might Show a Different Number
This is one of the most common points of confusion after performing an ATM balance check, and almost no other guide explains it clearly. Here’s the breakdown:
Ledger Balance is the total amount technically in your account, including all posted transactions as of the end of the previous business day. It does not account for pending holds or transactions that haven’t cleared yet.
Available Balance is the amount you can actually spend or withdraw right now. It subtracts pending holds (like a hotel deposit, a gas station pre-authorization, or a check that hasn’t fully cleared) from your ledger balance.
Example: Imagine your ledger balance is $500. You used your card at a gas station yesterday, and the pump placed a temporary $100 hold (even though you only bought $40 of gas — the hold is often higher than the actual purchase). Your available balance would show as $400, even though the actual ledger balance is $500.
When you perform an ATM balance check, most machines display the available balance — which is usually what you want, since it reflects what you can actually spend. However, if you notice your ATM balance check result doesn’t match what you expected, a pending hold is often the reason. These holds typically clear within 1-3 business days.
Alternative Ways to Check Your Balance (If You Don’t Have Your Card)
While an ATM balance check is fast and reliable, there are situations where you might not have your card on hand, or you simply want a quicker option. Here’s how the alternatives compare:
| Method | Speed | Requires Internet? | Requires Card? | Notes |
|---|---|---|---|---|
| ATM Balance Check | Fast (under 1 min) | No | Yes | Most universally available |
| Missed Call Banking | Instant (SMS reply) | No | No | Requires pre-registered phone number |
| SMS Banking | Near-instant | No | No | May require a specific keyword format |
| USSD Code (*99#) | Fast | No | No | Works on any phone, even basic feature phones |
| Mobile Banking App | Instant | Yes | No | Most detailed, shows full transaction history |
| Net Banking (Website) | Fast | Yes | No | Best for detailed statements |
| Bank Teller / Branch | Slow (wait times) | No | Sometimes | Best for complex queries |
Missed Call Banking, for example, lets you give a missed call to a number registered with your bank, and you’ll receive an SMS with your balance within seconds — no internet, no app, no card needed. This is a great backup option if an ATM balance check isn’t convenient.
USSD codes like *99# (common in India) work on even the most basic mobile phones without any internet connection, making them one of the most accessible alternatives to an ATM balance check for users without smartphones.
ATM Balance Check Charges and Limits: What You Need to Know
Here’s something most guides skip entirely: ATM balance checks aren’t always free.
Most banks allow a limited number of free transactions per month at other banks’ ATMs (i.e., ATMs not belonging to your own bank). This limit typically applies to all transaction types — including balance inquiries, not just cash withdrawals.
Once you exceed this free limit (commonly 3-5 transactions per month at non-home-bank ATMs), each additional ATM balance check at another bank’s machine may incur a small fee — often between $0.50 and $3, depending on the bank and country.
Tips to avoid unnecessary charges:
- Use your own bank’s ATMs whenever possible for an ATM balance check
- Switch to missed call banking or your mobile app for routine balance checks, saving your free ATM transactions for cash withdrawals
- Check your bank’s fee schedule (usually available on their website or app) to know your monthly free-transaction limit
Common ATM Balance Check Errors and How to Fix Them
Even with the right steps, things can occasionally go wrong during an ATM balance check. Here are the most common issues and what to do:
“Balance Enquiry Not Available” message: Some older or smaller-network ATMs don’t support balance inquiries for cards from certain banks. Try a different ATM, ideally one belonging to your own bank.
Card retained by the machine: If you enter the wrong PIN multiple times (usually 3 attempts) during an ATM balance check, the machine may retain your card for security. Contact your bank’s customer care immediately to report this and arrange a replacement.
Balance shown doesn’t match your app: As explained earlier, this is usually due to pending holds or transactions that haven’t posted yet. Wait 1-2 business days and check again.
Receipt printed with no balance amount: Some ATMs run out of receipt paper or have printer issues, resulting in a blank or partially printed receipt. The transaction usually still went through — check your account via another method to confirm.
ATM freezes or restarts mid-transaction: If the screen goes blank or the machine restarts during your ATM balance check, do not walk away immediately. Wait a minute to see if your card is returned. If not, contact the bank that owns the ATM and your own bank’s customer service.
Wrong account selected: If you have multiple linked accounts (savings, checking, credit) and selected the wrong one during your ATM balance check, simply start a new transaction and select the correct account this time.
Security Tips for ATM Balance Check Transactions
Even though an ATM balance check doesn’t involve withdrawing cash, it’s still an account access transaction and deserves the same security awareness:
- Cover the keypad with your hand when entering your PIN, even for a simple balance check
- Check for skimming devices — look for anything unusual attached to the card slot or keypad before inserting your card
- Take your receipt if one prints, since it may display your balance and partial account number
- Don’t perform an ATM balance check at unfamiliar or poorly lit ATMs, especially late at night
- Log out properly or remove your card promptly — don’t leave the session open
- Avoid using ATMs that look tampered with, such as those with loose card readers or stickers covering the bank’s logo
Which Method Should You Use? A Quick Decision Guide
To wrap up the practical side of this guide, here’s how to decide which balance-checking method fits your situation:
- No internet, but you have your card and you’re near an ATM → Do an ATM balance check; it’s fast and doesn’t require data
- No smartphone or internet at all → Use missed call banking or a USSD code
- You want full transaction history, not just balance → Use your mobile banking app or net banking
- You’re traveling internationally → An ATM balance check at a local ATM is often more reliable than apps, which may have connectivity issues abroad
- You need a printed record for budgeting or proof → Choose the receipt option during your ATM balance check
- You’ve already used your free monthly transactions at other banks’ ATMs → Switch to a free method like missed call banking or your app
Final Thoughts
An ATM balance check remains one of the simplest, most universally accessible ways to confirm your account balance — no internet, no app login, and no waiting on hold with customer service. By understanding the exact steps, knowing the difference between available and ledger balance, being aware of potential fees, and knowing how to troubleshoot common errors, you can use this everyday banking tool with confidence.
Whether you’re double-checking funds before a purchase, keeping tabs on your spending while traveling, or simply prefer the reliability of an ATM over an app, mastering the ATM balance check process puts you in better control of your finances — one quick transaction at a time.
Frequently Asked Questions
How do I do an ATM balance check without a receipt?
After entering your PIN and selecting “Balance Inquiry,” choose the on-screen display option instead of “Print Receipt” — your balance will appear directly on the ATM screen.
Can I check my balance at another bank’s ATM?
Yes, most ATMs allow balance inquiries for cards from other banks, though you may be limited to a certain number of free transactions per month before fees apply.
Why does my ATM balance check show a different amount than my banking app?
This is usually due to pending transactions or holds that have been deducted from your available balance but not yet reflected as posted transactions in your ledger balance.
What should I do if the ATM retains my card during a balance check?
Contact your bank’s customer service immediately to report the retained card and request guidance on retrieval or replacement.
Is there a fee for checking my balance at an ATM?
Checking your balance at your own bank’s ATM is usually free, but inquiries at other banks’ ATMs may count toward a limited monthly free-transaction allowance before fees apply.
Can I check my balance at an ATM without my card?
No, a physical card is required for an ATM balance check; if you don’t have your card, use alternatives like missed call banking, USSD codes, or your mobile banking app.
How long does an ATM balance check take?
The entire process typically takes under one minute, from inserting your card to viewing or printing your balance.
Does an ATM balance check use up my daily withdrawal limit?
No, balance inquiries are separate from cash withdrawals and do not affect your daily withdrawal limit.
What if the ATM says “Balance Enquiry Not Available”?
This usually means the specific ATM doesn’t support balance checks for your card’s bank network; try an ATM operated by your own bank instead.
Can I check the balance of a joint account at an ATM?
Yes, as long as you have a debit card linked to the joint account and the correct PIN, you can perform a standard ATM balance check on that account.